Difference between revisions of "Adding Notes"
From Optisoft
| (One intermediate revision by the same user not shown) | |||
| Line 1: | Line 1: | ||
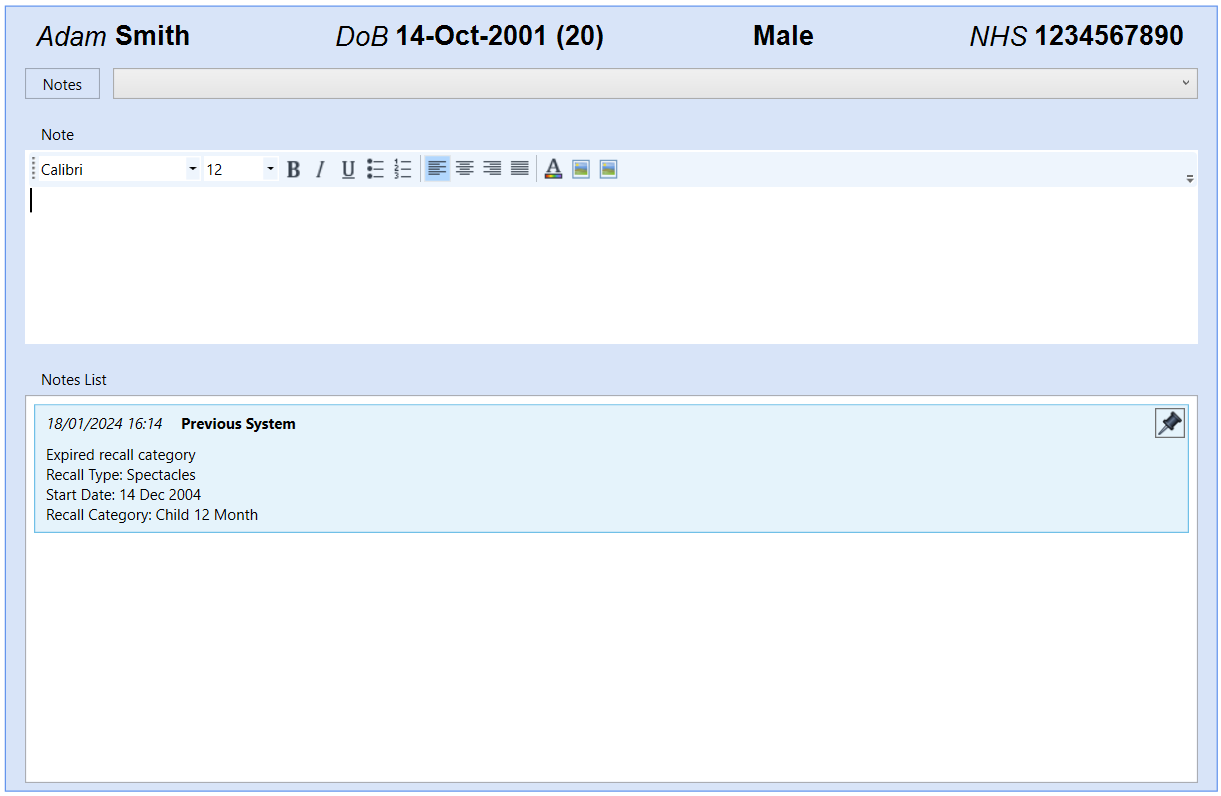
Optisoft.Net allows you to add transactional Notes to your Patient Records. | Optisoft.Net allows you to add transactional Notes to your Patient Records. | ||
| − | <center>[[image: | + | <center>[[image:PatientsNotes2022.png|border|900px|Patients Notes]]</center> |
*You will first need to find a patient record. | *You will first need to find a patient record. | ||
*Select Add New Note from the Notes tab located at the bottom of the Record screen. | *Select Add New Note from the Notes tab located at the bottom of the Record screen. | ||
*You will now be able to enter your Note by either free typing, or selecting from the predefined drop down list. | *You will now be able to enter your Note by either free typing, or selecting from the predefined drop down list. | ||
| + | *Formatting options such as Bold, Italic and Underlined text are available from the toolbar. | ||
| + | *When saved, Notes are displayed in reverse chronological order, however, you will have the option to Pin notes to the top of the displayed list as necessary. | ||
*Click on Save and then Back when finished, or use the Auto Save feature. | *Click on Save and then Back when finished, or use the Auto Save feature. | ||
[[Patients|Back]] | [[Patients|Back]] | ||
[[Optisoft.NET Help|Home]] | [[Optisoft.NET Help|Home]] | ||
Latest revision as of 14:42, 10 March 2022
Optisoft.Net allows you to add transactional Notes to your Patient Records.

- You will first need to find a patient record.
- Select Add New Note from the Notes tab located at the bottom of the Record screen.
- You will now be able to enter your Note by either free typing, or selecting from the predefined drop down list.
- Formatting options such as Bold, Italic and Underlined text are available from the toolbar.
- When saved, Notes are displayed in reverse chronological order, however, you will have the option to Pin notes to the top of the displayed list as necessary.
- Click on Save and then Back when finished, or use the Auto Save feature.