Difference between revisions of "Creating a Receipt Template"
From Optisoft
| (2 intermediate revisions by the same user not shown) | |||
| Line 1: | Line 1: | ||
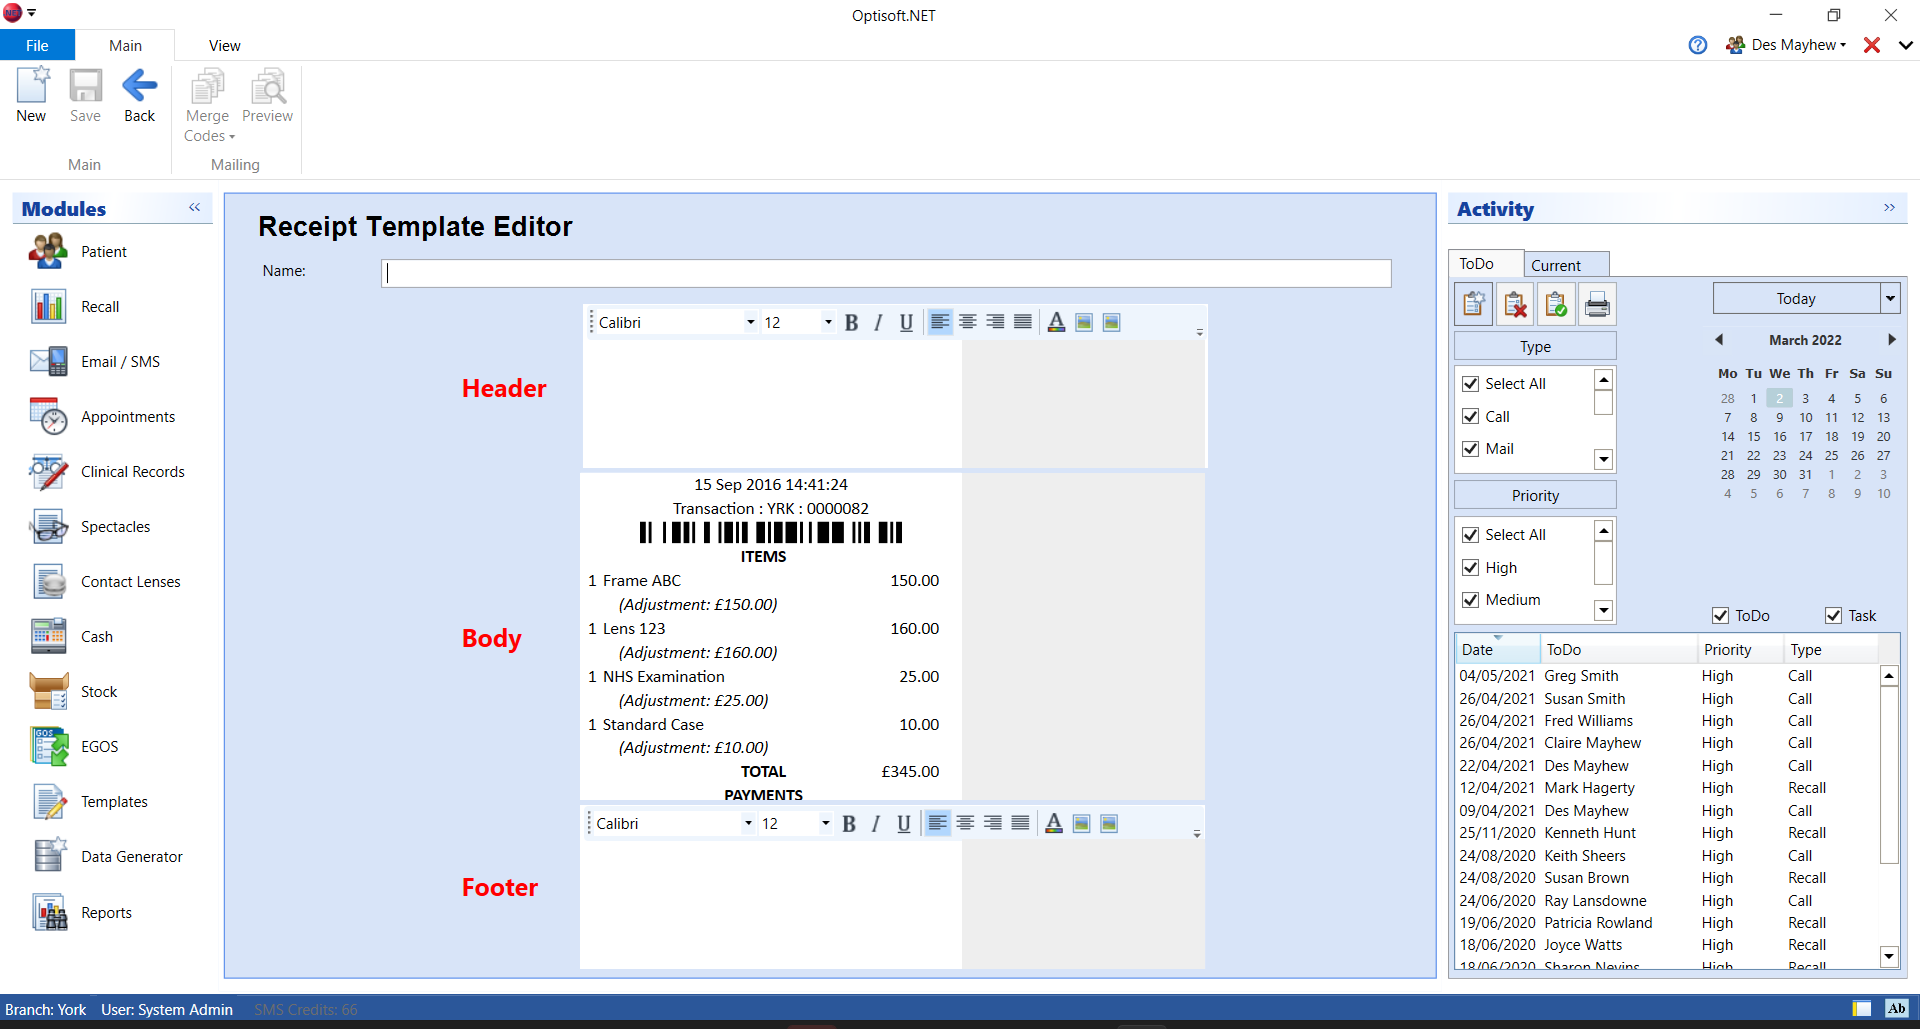
Once you have selected your options in the Template Maintenance screen, click Template Editor and you will be taken to the Receipt Template Editor. | Once you have selected your options in the Template Maintenance screen, click Template Editor and you will be taken to the Receipt Template Editor. | ||
| − | <center>[[image: | + | <center>[[image:TemplateReceiptEditor2022.png|border|1020px|SMS Template Maintenance]]</center> |
=Creating a Template= | =Creating a Template= | ||
| Line 13: | Line 13: | ||
*Editor | *Editor | ||
**Toolbar - Editing tools such as Font, Font Size, Alignment and Insert Picture can all be found within the Toolbar of both the header and footer sections. | **Toolbar - Editing tools such as Font, Font Size, Alignment and Insert Picture can all be found within the Toolbar of both the header and footer sections. | ||
| − | + | ||
| − | + | ||
| − | + | ||
[[Templates|Back]] | [[Templates|Back]] | ||
[[Optisoft.NET Help|Home]] | [[Optisoft.NET Help|Home]] | ||
Latest revision as of 15:20, 10 March 2022
Once you have selected your options in the Template Maintenance screen, click Template Editor and you will be taken to the Receipt Template Editor.

Creating a Template
In order to create a Receipt Template follow the below procedure:
- Give your Template a Name.
- You can now design your Template as necessary.
- Click Save and Back, or use the Auto Save feature.
Editor Options
The Receipt Editor has some useful features as described below:
- Editor
- Toolbar - Editing tools such as Font, Font Size, Alignment and Insert Picture can all be found within the Toolbar of both the header and footer sections.