Difference between revisions of "Maintaining the Recall Module"
From Optisoft
| (18 intermediate revisions by the same user not shown) | |||
| Line 1: | Line 1: | ||
__TOC__ | __TOC__ | ||
| − | |||
| − | |||
| − | |||
==Creating a Recall Type== | ==Creating a Recall Type== | ||
In order to create a Recall Type, follow the below instruction. | In order to create a Recall Type, follow the below instruction. | ||
| + | |||
| + | <center>[[image:RecallTypeMaintenanceMay23.png|border|900px|Recall Type Maintenance]]</center> | ||
| + | |||
| + | *Click on the Recall module | ||
| + | *Click on Type maintenance either using the on screen button, or via the Maintenance option in the toolbar | ||
| + | *In the Name text box give your Recall Type a name | ||
| + | *Click Save and then Back when you are finished, or use the Auto Save feature. | ||
| + | *Please note, by default, all Recall Types are available at all branches throughout the database | ||
| + | |||
| + | ===Recall Type Options=== | ||
| + | *Do not supress - This will prevent and recalls under this Type from suppressing when an a future booked appointment has been made for the relevant patient. | ||
| + | *Use for date of last sight test - If ticked, any recall under the selected Type, will be used in the Date of Last Sight Test calculation. | ||
==Creating a Recall Category== | ==Creating a Recall Category== | ||
In order to create a Recall Category, follow the below instruction. | In order to create a Recall Category, follow the below instruction. | ||
| + | |||
| + | <center>[[image:RecallCategoryMaintenanceMay23.png|border|900px|Recall Category Maintenance]]</center> | ||
| + | |||
| + | *Click on the Recall module | ||
| + | *Click on Category maintenance either using the on screen button, or via the Maintenance option in the toolbar | ||
| + | *Select the Recall Type you wish your new Category to be under | ||
| + | *In the Name text box give your Recall Category a name | ||
| + | *In the branch selector tick all the branches you want your new category to be available at | ||
| + | *Click Save and then Back when you are finished, or use the Auto Save feature. | ||
==Adding Recall Bands== | ==Adding Recall Bands== | ||
In order to add a Recall Band to a Recall Category, follow the below instruction. | In order to add a Recall Band to a Recall Category, follow the below instruction. | ||
| + | |||
| + | <center>[[image:RecallBandMaintenanceMay23.png|border|900px|Recall Band Maintenance]]</center> | ||
| + | |||
| + | *Click on the Recall module | ||
| + | *Click on Band maintenance either using the on screen button, or via the Maintenance option in the toolbar | ||
| + | *Select the Recall Type your relevant Category is under | ||
| + | *Select the Recall Category you wish to add your new Band to | ||
| + | *Now, type the Interval and select the Period and all necessary Templates you wish to be included in the Recall Band. If you do not have any Templates created yet, please go to the Template Designer help section to find out how. | ||
| + | *At this point you can also tick the Auto tick box to make this Recall Band automated | ||
| + | *Click Save and then Back when you are finished, or use the Auto Save feature | ||
==Recall Enclosures== | ==Recall Enclosures== | ||
| + | Recall enclosures consist of Rules grouped together for ease of use | ||
| + | |||
| + | ===Creating Recall Enclosure Groups=== | ||
| + | In order to create a Recall Enclosure Group, follow the below instruction. | ||
| + | |||
| + | <center>[[image:RecallEnclosureGroup.jpg|border|900px|Recall Enclosure Group Maintenance]]</center> | ||
| + | |||
| + | |||
| + | *Go to the Recall Module | ||
| + | *Click on Group maintenance either using the on screen button on the Enclosures tab, or via the Maintenance option in the toolbar | ||
| + | *Type a name for your Group and select which branches this Group will be available at | ||
| + | *Click Save and then Back when you are finished, or use the Auto Save feature | ||
| + | |||
| + | ===Creating Recall Enclosure Rules=== | ||
| + | In order to create a Recall Enclosure Rule and add it to a Recall Enclosure Group, follow the below instruction. | ||
| + | |||
| + | <center>[[image:RecallEnclosureRule.jpg|border|900px|Recall Enclosure Rule Maintenance]]</center> | ||
| + | |||
| + | |||
| + | *Go to the Recall Module | ||
| + | *Click on Rule maintenance either using the on screen button on the Enclosures tab, or via the Maintenance option in the toolbar | ||
| + | *Select the Group you wish your new rule to go under | ||
| + | *Click on the Name button. Give your Rule a Name and select which branches this Rule will be available at | ||
| + | *Click Save and then Back, or use the Auto Save feature | ||
| + | *Select your new rule in the Name combo box | ||
| + | *Type any text you would like to include in your Rule | ||
| + | *Double click on any Enclosure Inserts you would like to include in your Rule under the Inserts list | ||
| + | *Now, click on the Criteria tab | ||
| + | *Using the Tables and Fields lists in conjunction with the Operator, Value, Combine and Options options, you need to create the necessary criteria for your Rule | ||
| + | *If necessary you can use the Execute Query button in the toolbar to see which Patients your new Rule will apply to | ||
| + | *Click Save and then Back when you are finished, or use the Auto Save feature | ||
Latest revision as of 14:22, 30 May 2023
Contents
Creating a Recall Type
In order to create a Recall Type, follow the below instruction.
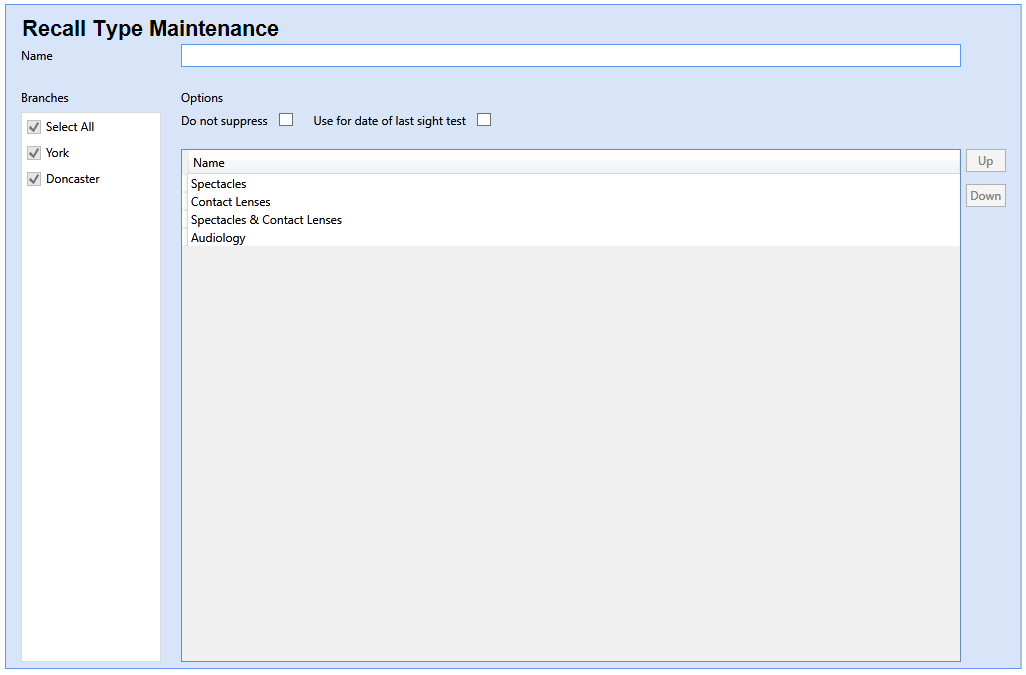
- Click on the Recall module
- Click on Type maintenance either using the on screen button, or via the Maintenance option in the toolbar
- In the Name text box give your Recall Type a name
- Click Save and then Back when you are finished, or use the Auto Save feature.
- Please note, by default, all Recall Types are available at all branches throughout the database
Recall Type Options
- Do not supress - This will prevent and recalls under this Type from suppressing when an a future booked appointment has been made for the relevant patient.
- Use for date of last sight test - If ticked, any recall under the selected Type, will be used in the Date of Last Sight Test calculation.
Creating a Recall Category
In order to create a Recall Category, follow the below instruction.
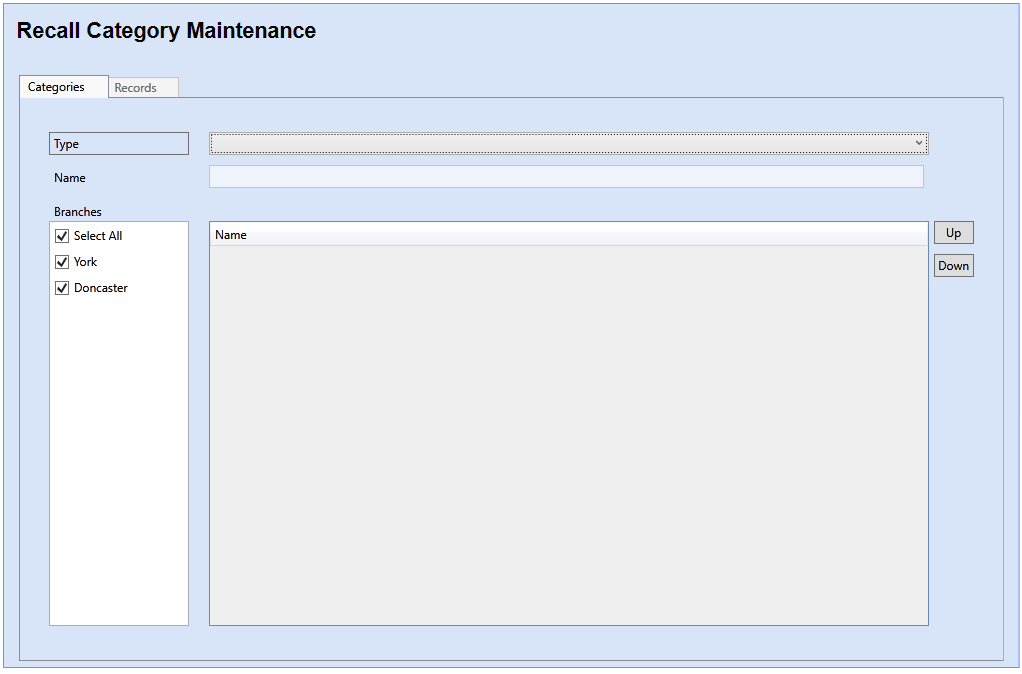
- Click on the Recall module
- Click on Category maintenance either using the on screen button, or via the Maintenance option in the toolbar
- Select the Recall Type you wish your new Category to be under
- In the Name text box give your Recall Category a name
- In the branch selector tick all the branches you want your new category to be available at
- Click Save and then Back when you are finished, or use the Auto Save feature.
Adding Recall Bands
In order to add a Recall Band to a Recall Category, follow the below instruction.
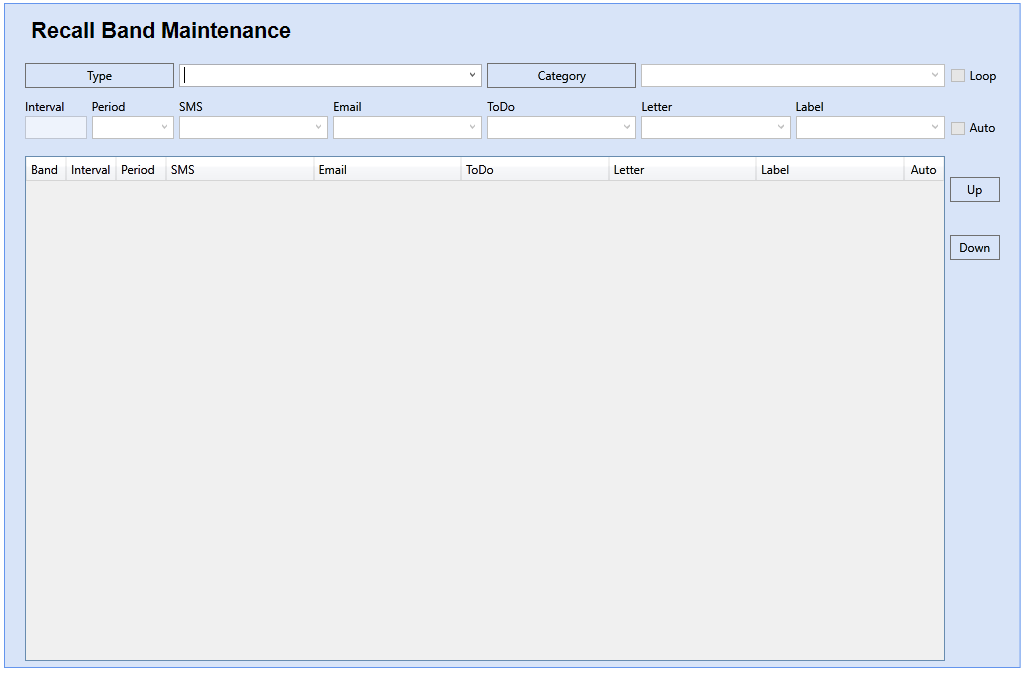
- Click on the Recall module
- Click on Band maintenance either using the on screen button, or via the Maintenance option in the toolbar
- Select the Recall Type your relevant Category is under
- Select the Recall Category you wish to add your new Band to
- Now, type the Interval and select the Period and all necessary Templates you wish to be included in the Recall Band. If you do not have any Templates created yet, please go to the Template Designer help section to find out how.
- At this point you can also tick the Auto tick box to make this Recall Band automated
- Click Save and then Back when you are finished, or use the Auto Save feature
Recall Enclosures
Recall enclosures consist of Rules grouped together for ease of use
Creating Recall Enclosure Groups
In order to create a Recall Enclosure Group, follow the below instruction.
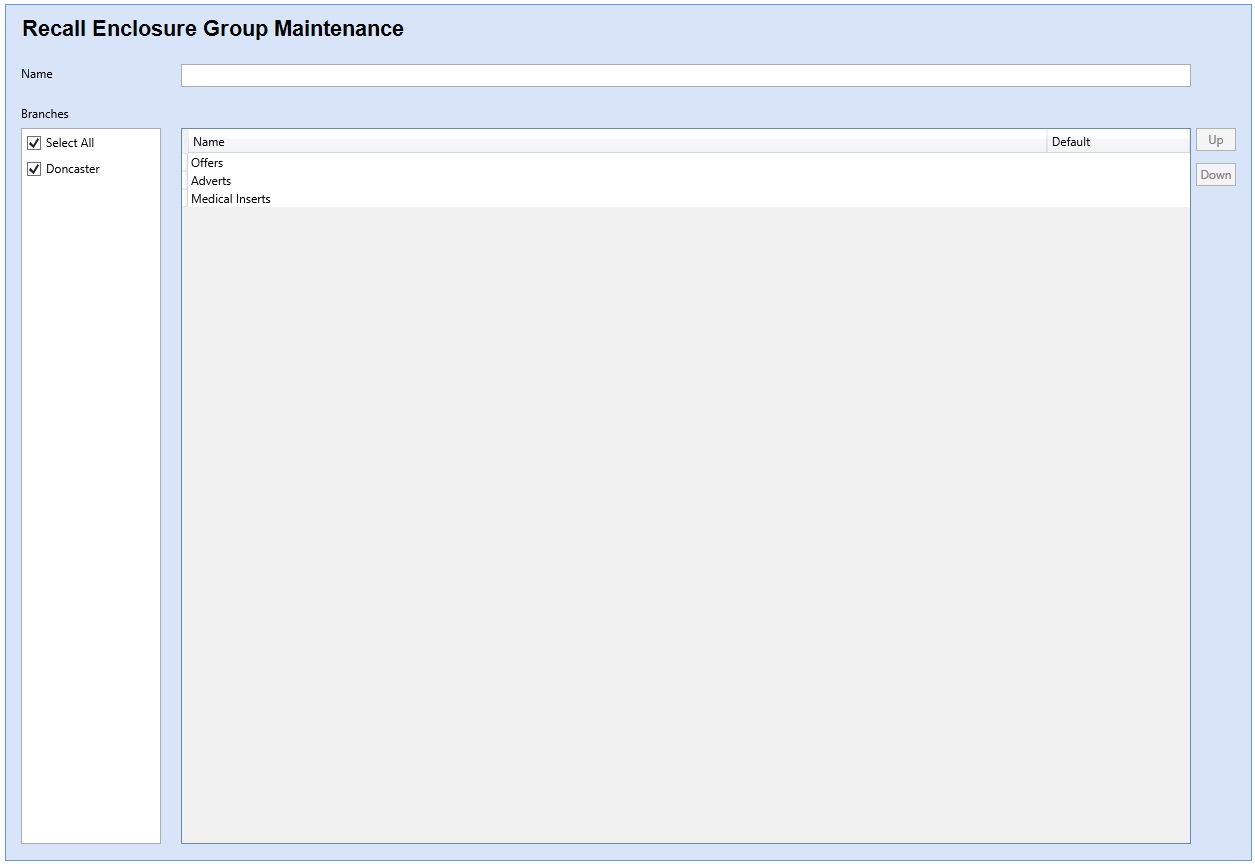
- Go to the Recall Module
- Click on Group maintenance either using the on screen button on the Enclosures tab, or via the Maintenance option in the toolbar
- Type a name for your Group and select which branches this Group will be available at
- Click Save and then Back when you are finished, or use the Auto Save feature
Creating Recall Enclosure Rules
In order to create a Recall Enclosure Rule and add it to a Recall Enclosure Group, follow the below instruction.
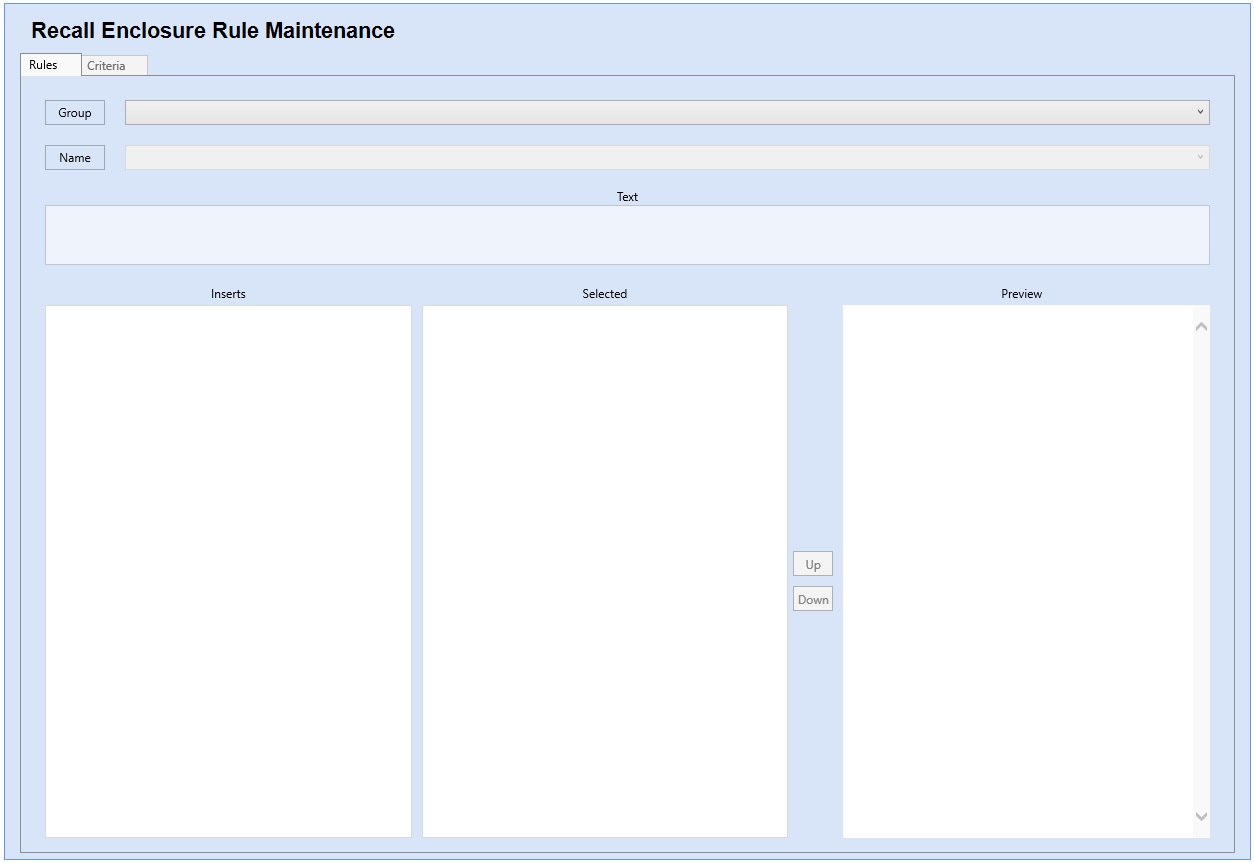
- Go to the Recall Module
- Click on Rule maintenance either using the on screen button on the Enclosures tab, or via the Maintenance option in the toolbar
- Select the Group you wish your new rule to go under
- Click on the Name button. Give your Rule a Name and select which branches this Rule will be available at
- Click Save and then Back, or use the Auto Save feature
- Select your new rule in the Name combo box
- Type any text you would like to include in your Rule
- Double click on any Enclosure Inserts you would like to include in your Rule under the Inserts list
- Now, click on the Criteria tab
- Using the Tables and Fields lists in conjunction with the Operator, Value, Combine and Options options, you need to create the necessary criteria for your Rule
- If necessary you can use the Execute Query button in the toolbar to see which Patients your new Rule will apply to
- Click Save and then Back when you are finished, or use the Auto Save feature