Difference between revisions of "Ending a Clinical Record Visit"
| (2 intermediate revisions by the same user not shown) | |||
| Line 3: | Line 3: | ||
To End the Visit, you must click on the End Visit button in the toolbar. | To End the Visit, you must click on the End Visit button in the toolbar. | ||
| + | |||
| + | <center>[[image:ClinicalEndVisit2022.png|border|Clinical Records End Visit]]</center> | ||
==Patient Tab== | ==Patient Tab== | ||
| Line 24: | Line 26: | ||
<center>[[image:ClinicalEndVisitVisitTab2022.png|border|700px|Clinical Records End Visit]]</center> | <center>[[image:ClinicalEndVisitVisitTab2022.png|border|700px|Clinical Records End Visit]]</center> | ||
| − | For users using the eGOS module, you will also have the opportunity to create a GOS 1 Form at this stage, by | + | For users using the eGOS module, you will also have the opportunity to create a GOS 1 Form at this stage, by clicking the Create GOS 1 button. |
| + | |||
| + | Once a GOS 1 is created you will also then be able to create a GOS 3 Form, by clicking the Create GOS 3 button. | ||
| + | |||
| + | Should a GOS 1 or 3 Form have already been created for the patient in your visit, the details you enter at this stage will be added to those forms, rather than creating new ones. | ||
When ready you can click the Finish button. Please note, it is only at this point that the information is updated in the Patient module. | When ready you can click the Finish button. Please note, it is only at this point that the information is updated in the Patient module. | ||
Latest revision as of 08:25, 31 May 2023
Ending a Visit
When you have completed your Clinical Visit and updated all the page information, you must then End the Visit. Ending the Visit will update the Patients Module with the Recall and Rx details that you have recorded during the Clinical Visit. Patient Analysis Codes and Appointment Outcomes, can also be updated at this stage.
To End the Visit, you must click on the End Visit button in the toolbar.
Patient Tab
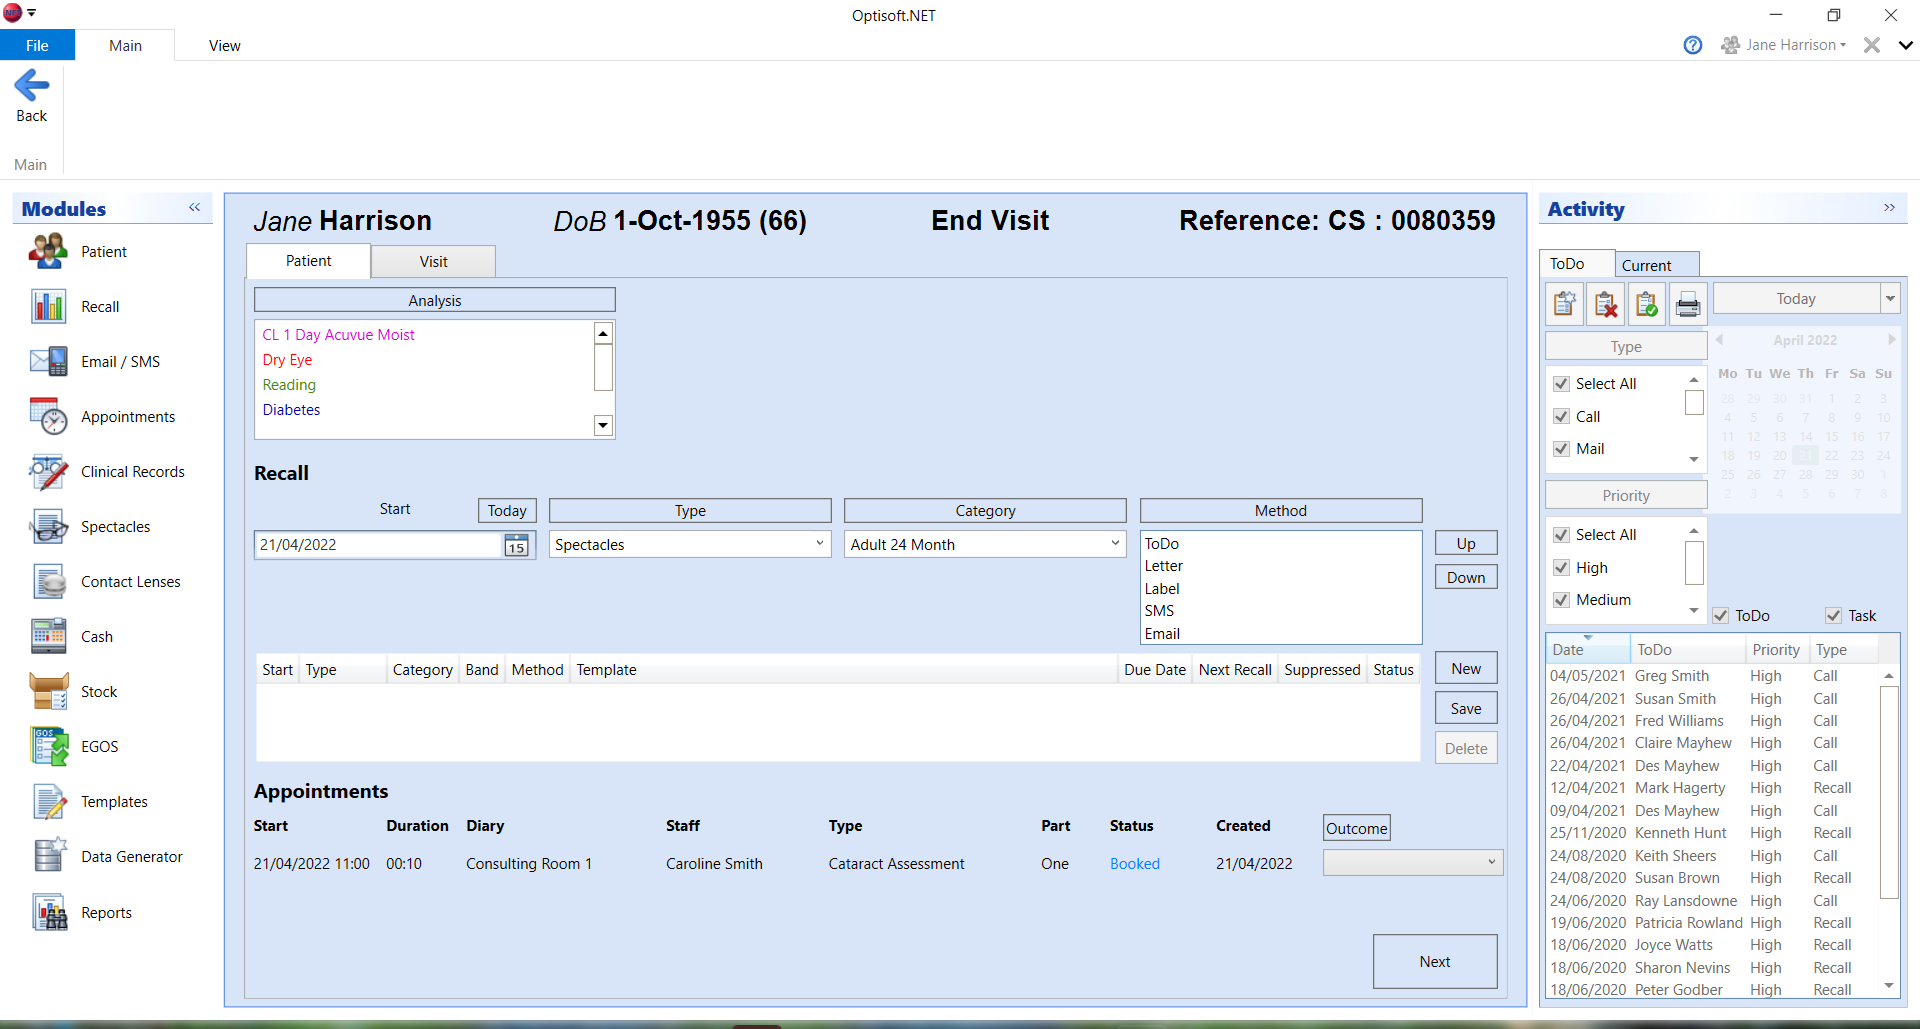
The Patient tab allows you to update the Patients Recall and the Appointment Outcome.
You can also review the Patient Analysis Codes that will be updated.

To update the Patients Recall, you need to select an appropriate Start Date, Recall Type, Recall Category and set the Recall Preference order. When selected, you must then click Save and update the Recall Grid.
Please note, if a Patient already has a recall of the same type that you wish to update, you must double click on the relevant recall in the Recall Grid first.
When ready, you can then click on Next to move onto the next tab.
Visit Tab
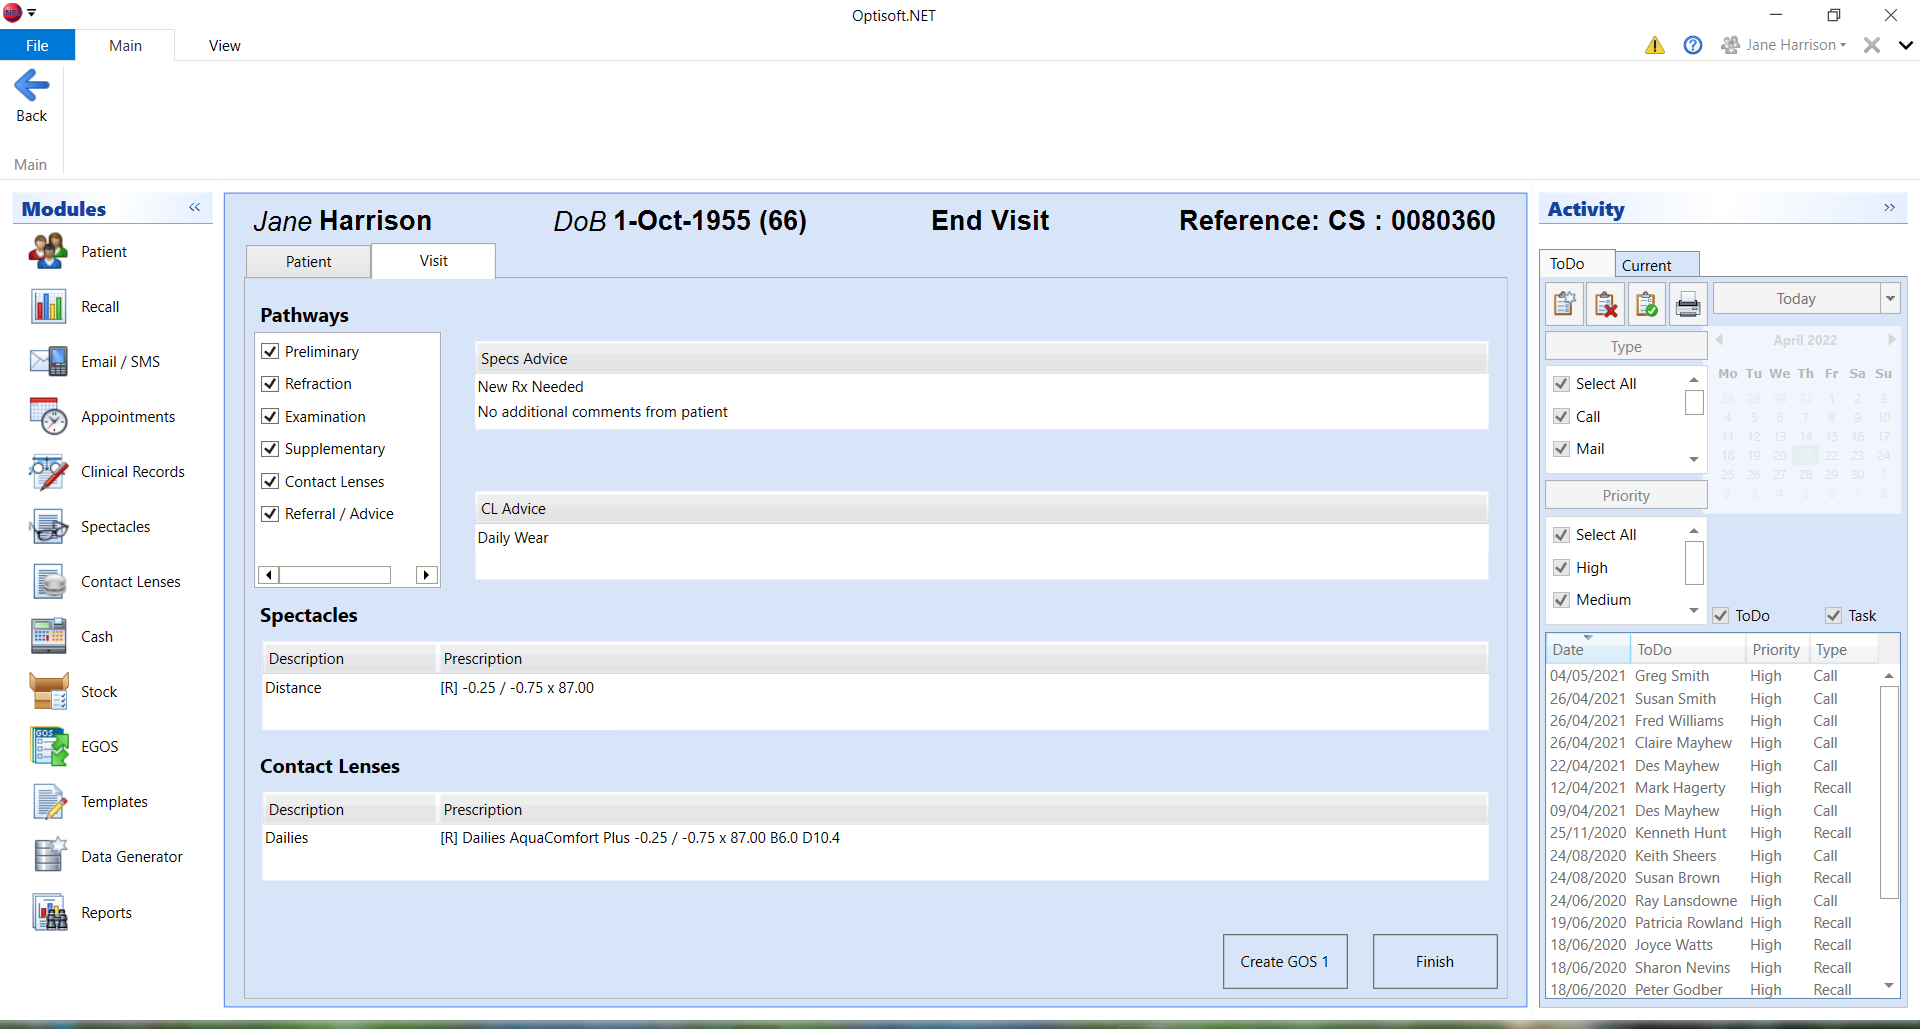
The Visit Tab allows you to review the Advice and Rx details that you have recorded in your Clinical Visit.
There is also a Pathway check list so you can check nothing has been missed out during the Visit.

For users using the eGOS module, you will also have the opportunity to create a GOS 1 Form at this stage, by clicking the Create GOS 1 button.
Once a GOS 1 is created you will also then be able to create a GOS 3 Form, by clicking the Create GOS 3 button.
Should a GOS 1 or 3 Form have already been created for the patient in your visit, the details you enter at this stage will be added to those forms, rather than creating new ones.
When ready you can click the Finish button. Please note, it is only at this point that the information is updated in the Patient module.