Difference between revisions of "Booking an Appointment"
From Optisoft
| (One intermediate revision by the same user not shown) | |||
| Line 1: | Line 1: | ||
In order to book an appointment, you need to do the following. | In order to book an appointment, you need to do the following. | ||
| − | <center>[[image: | + | <center>[[image:BookingAppointment.png|border|1020px|Appointment Booking]]</center> |
Latest revision as of 14:59, 10 March 2022
In order to book an appointment, you need to do the following.

- Start by finding the relevant patient record in the Patient module. Alternatively, for new patients, you can create a new patient record.
- Doing either of the above will make the relevant patient the Active Patient in the top right of the screen.
- Click on the Appointment module. Your patient should still be shown as the Active Patient.
- Navigate to the correct day using the Next/Previous day buttons, or by using the calendar control.
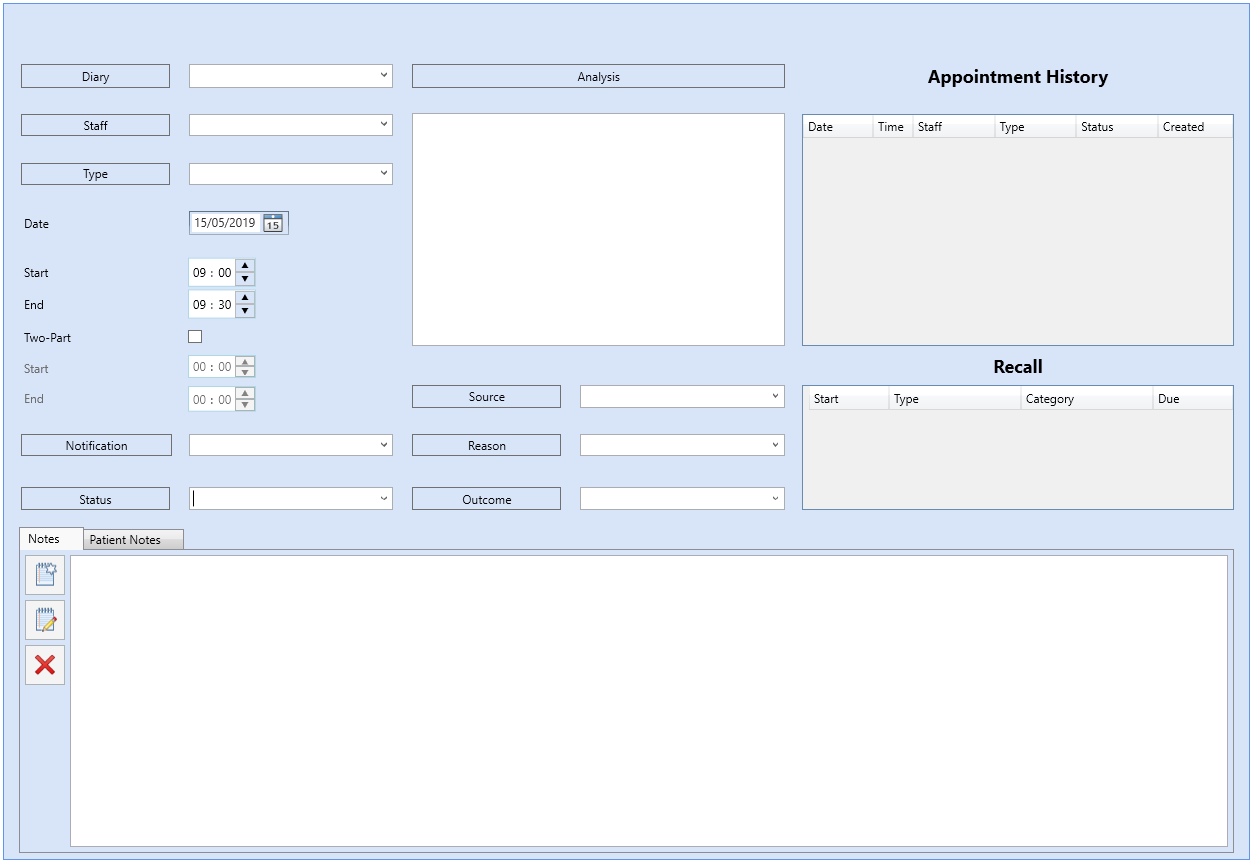
- Double click on the start time or on the Appointment Template where you wish your appointment to start from. You will be taken to the Appointment Booking Screen.
- You now need to fill in the necessary Diary, Staff Member and Appointment Type, some of which may be populated for you, depending on how your system has been configured.
- You can now alter the Date, Start and End time as well as choosing whether a second part to the appointment is necessary.
- Source, Reason and Notification can also be configured at this point, by selecting options in the relevant drop down list.
- If any Notes are required for this appointment, they can now be added at this stage using the New Notes button.
- Click on Save and then Back when finished, or use the Auto Save feature.
A few things to remember:
- The End time of the appointment will automatically be configured when you choose your appointment type. This can then be altered if you require this appointment to be shorter or longer than usual.
- The Status of the appointment (Booked) will be automatically selected for you and shouldn't be changed at this point.
- The Notification for the appointment will be automatically selected for you based off either the Appointment Status or the Appointment Type. However, you can change this if necessary for this appointment.
- You can't make Notes on an appointment until you have filled in the minimum requirements (Diary, Staff, Type and Patient).