Difference between revisions of "Maintaining the Spectacles Module"
From Optisoft
(→Suppliers) |
(→Adding Suppliers) |
||
| Line 5: | Line 5: | ||
*Enter the name, address and contact details of the Supplier. | *Enter the name, address and contact details of the Supplier. | ||
*From the Type list, double click on each Product Type that your Supplier provides. This will add the Types to the Selected list. | *From the Type list, double click on each Product Type that your Supplier provides. This will add the Types to the Selected list. | ||
| − | *Click Save or | + | *Click Save or use the auto save feature. |
==Creating Payment Types== | ==Creating Payment Types== | ||
Revision as of 09:46, 9 March 2022
Contents
Adding Suppliers
In order to add products into Optisoft.NET, you will need to add Suppliers first. To add a Supplier through the Spectacles module, do the following:
- Go to the Spectacles module.
- Either click the Supplier button onscreen, or go to the Maintenance tab and click Suppliers.
- Enter the name, address and contact details of the Supplier.
- From the Type list, double click on each Product Type that your Supplier provides. This will add the Types to the Selected list.
- Click Save or use the auto save feature.
Creating Payment Types
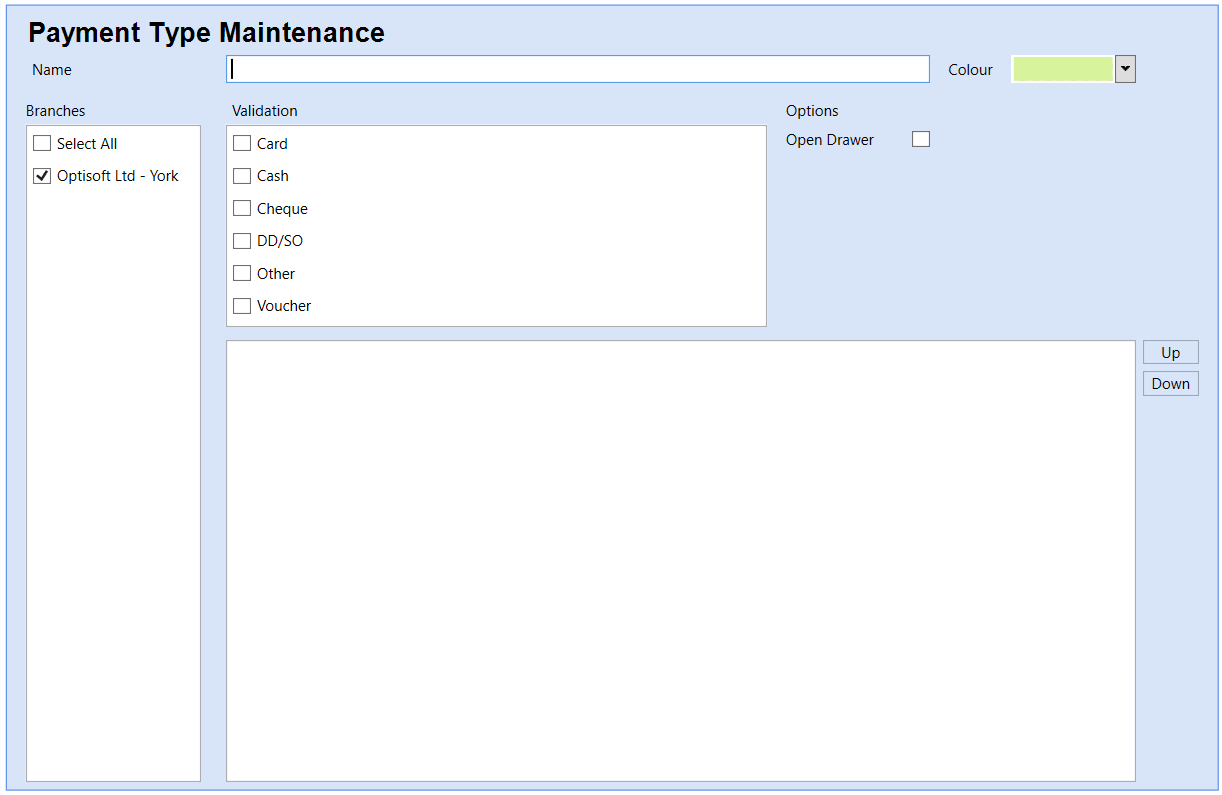
To create a Payment Type in the Cash Module, you need to do the following.

- Go to the Cash Module.
- Click the Maintenance tab in the toolbar.
- Click Type in the Payment group.
- Enter a Payment Type Name.
- Choose a colour.
- Select a validation option.
- Select the appropriate choices from the Options list.
- Open Drawer - Will open the till drawer when this Payment Type is used in a transaction.
- Click Save or use the Auto Save feature.
Creating Payment Categories
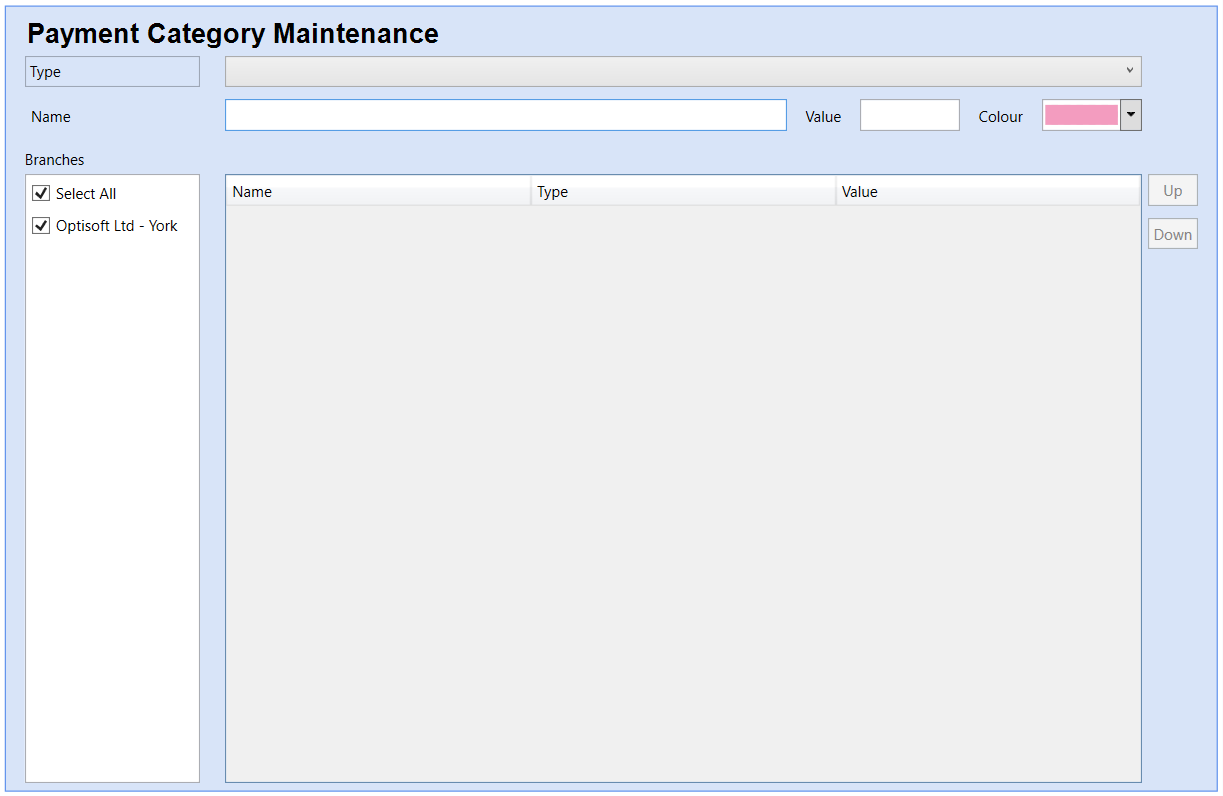
To create a Payment Category in the Cash Module, you need to do the following.

- Go to the Cash Module.
- Click the Maintenance tab in the toolbar.
- Click Category in the Payment group.
- Choose a Payment Type for your Category
- Enter a Payment Category Name.
- Enter a Value if necessary.
- Choose a colour.
- Click Save or use the Auto Save feature.