Difference between revisions of "Saving Documents"
From Optisoft
| Line 9: | Line 9: | ||
*You will now be able to select the Type and the Name of the Document and if necessary change the Date. | *You will now be able to select the Type and the Name of the Document and if necessary change the Date. | ||
*Click on Scan. | *Click on Scan. | ||
| + | *This should then launch your scanners software. Scan the document. | ||
| + | *You will now see a preview of the document you have just scanned. | ||
| + | *You can now choose to make Notes against the Scan, by either free typing, or selecting from the predefined drop down list. | ||
| + | *Click on Save and then Back when you have finished. | ||
| Line 21: | Line 25: | ||
*You can now choose to make Notes against the Document, by either free typing, or selecting from the predefined drop down list. | *You can now choose to make Notes against the Document, by either free typing, or selecting from the predefined drop down list. | ||
*Click on Save and then Back when you have finished. | *Click on Save and then Back when you have finished. | ||
| + | |||
[[Patients|Back]] | [[Patients|Back]] | ||
[[Optisoft.NET Help|Home]] | [[Optisoft.NET Help|Home]] | ||
Revision as of 11:45, 20 November 2014
This page is currently under construction
Scanning Documents
In order to Scan a Document to a Record, follow the below instruction.

- You will first need to find a patient record.
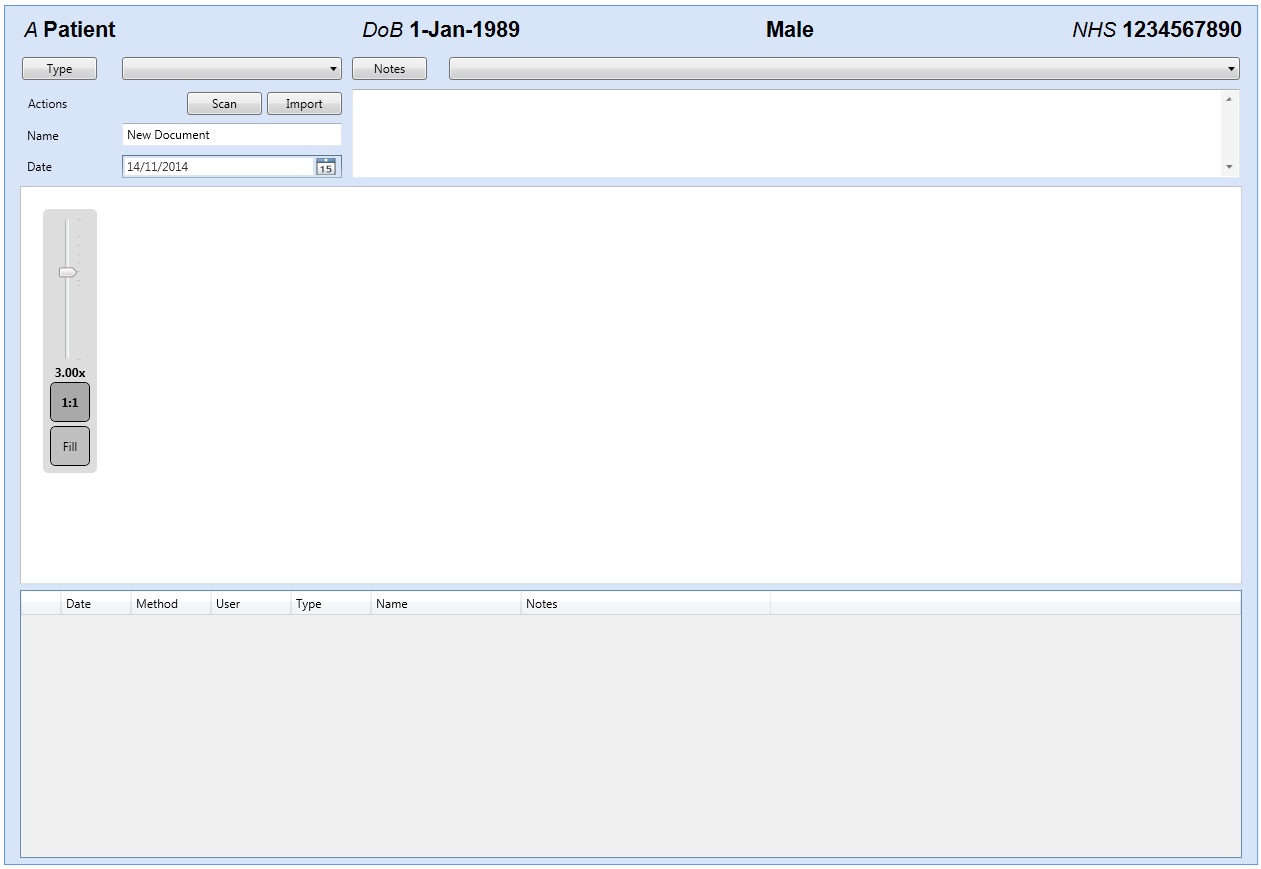
- Select Add a New Document from the Document tab located at the bottom of the Record screen.
- You will now be able to select the Type and the Name of the Document and if necessary change the Date.
- Click on Scan.
- This should then launch your scanners software. Scan the document.
- You will now see a preview of the document you have just scanned.
- You can now choose to make Notes against the Scan, by either free typing, or selecting from the predefined drop down list.
- Click on Save and then Back when you have finished.
Importing Documents
In order to Import a Document to a Record, follow the below instruction.
- You will first need to find a patient record.
- Select Add a New Document from the Document tab located at the bottom of the Record screen.
- You will now be able to select the Type and the Name of the Document and if necessary change the Date.
- Click on Import.
- Navigate to the location of the Saved Document you with to Import, select and then click Open.
- You will now see a preview of the document you have just selected.
- You can now choose to make Notes against the Document, by either free typing, or selecting from the predefined drop down list.
- Click on Save and then Back when you have finished.