Creating a Contact Lens Dispense
Contents
Creating a Dispense
In order to create a dispense you need to work your way through the tabs at the top of the Contact Lens Dispensing screen.
At any point throughout the dispense, you can save and come out of the dispensing module by clicking the Back button in the toolbar. Provided all mandatory information is present, this will auto save your dispense and place it on the Status 'On Hold'.
Dispenses that have a Status of 'On Hold' can be edited at any time.
Dispense Rx Tab
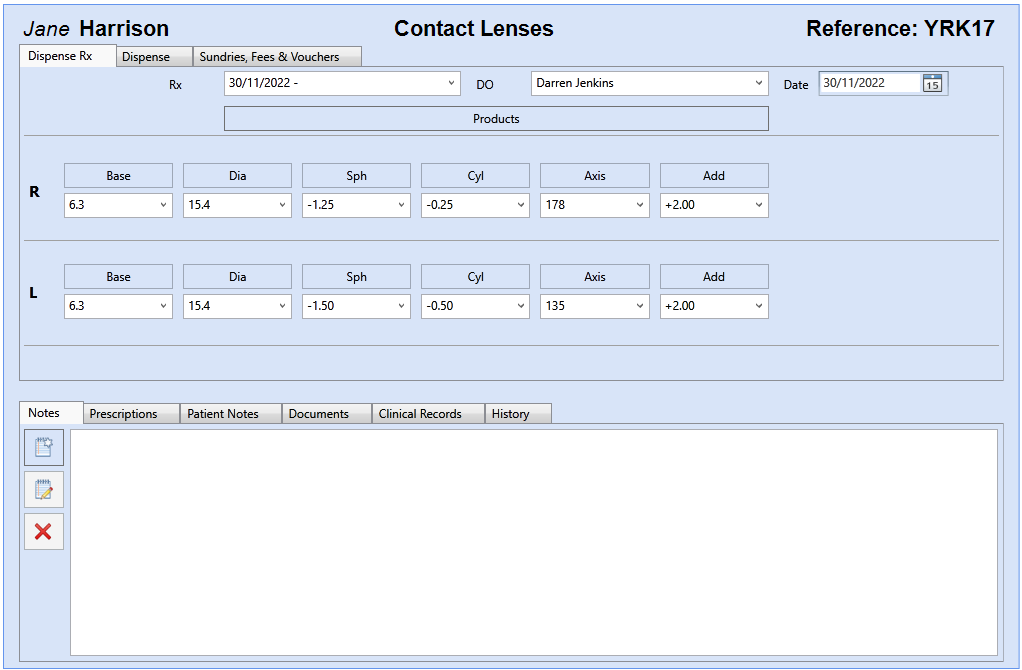
On the Dispense Rx Tab you can specify the Rx that will be used with your dispense.

First of all, you need to configure the following fields:
- Date - This is the date you created your dispense. By default, this field will be set to Today's date.
- Rx - Given Rx's can be picked up from the Patient Record and used as a Dispensing Rx by selecting them from this drop down.
- DO - Here you can specify the Dispensing Optician.
You will be able to see the Dispense Rx. It is important to remember the following:
- The values on the dispense Rx can be changed if required.
- The dispense Rx exists only on this dispense and is not saved back to the Patient Record.
Dispense Tab
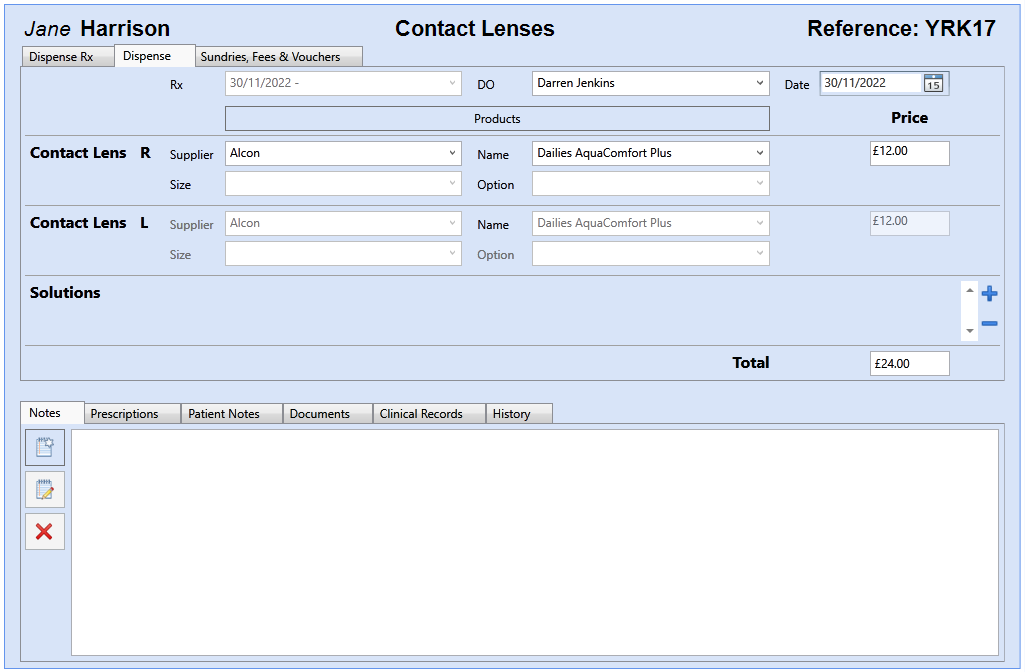
On the Dispense tab you can select the Lenses and any Solutions required for your dispense. All the fields on the Dispense tab can be populated by either using the drop down menus, or by free typing the relevant information.

For Lenses, simply enter or select the Supplier, Lens Name, Size and Option. The Left lens is automatically locked to the Right lens, however, you can use the 'Separate Eyes' button in the toolbar to select a different lens in the Left Eye, if necessary.
To add a Solution to the dispense, click on the '+' symbol to the right of the screen.
You can have as many Solutions on a dispense as required.
Sundries Fees & Vouchers Tab
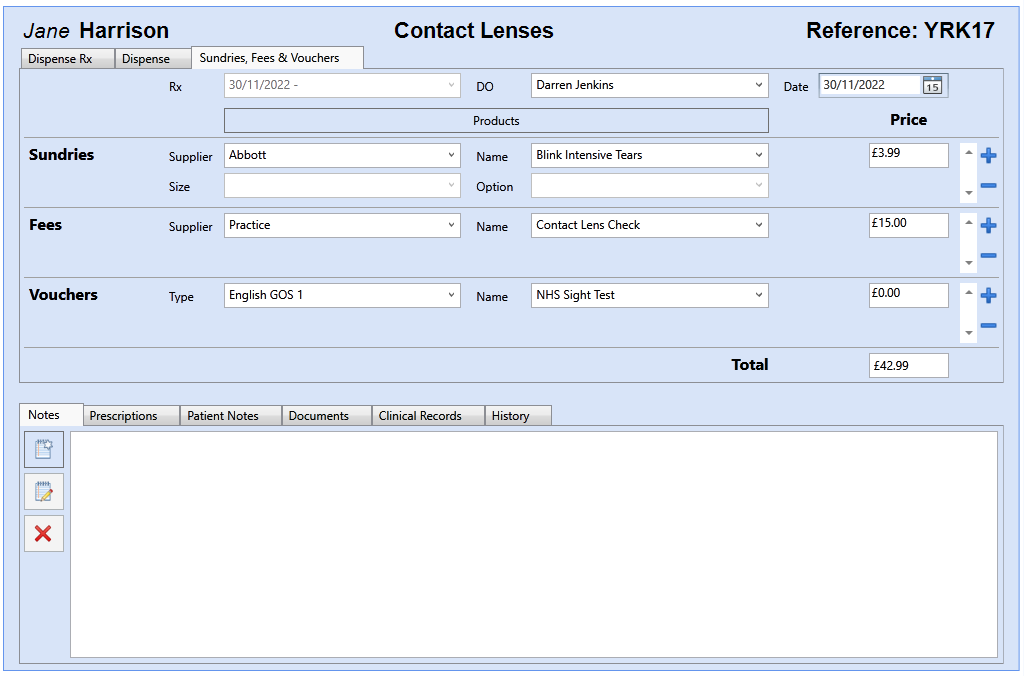
The Sundries Fees & Vouchers tab, allows you to select any additional products or vouchers required for your dispense.

Similar to Solutions, you can click on the '+' symbol on the right hand side of the screen, to add a product to each section.
Similar to the Dispense tab, products can either be selected from the drop down list, or free typed, with the exception of Vouchers.
Vouchers are taken from the Cash module and can be configured there. The combined value of the Vouchers section is taken away from the dispense total.