Maintaining the Stock Module
Contents
Suppliers
In order to add a Supplier into the software, you need to get to Supplier Maintenance.
To get to Supplier Maintenance while in the Stock module, you can either click on the Supplier button on screen, or, go to the Maintenance tab in the ribbon and click the Supplier button.
To add a new Supplier do the following:
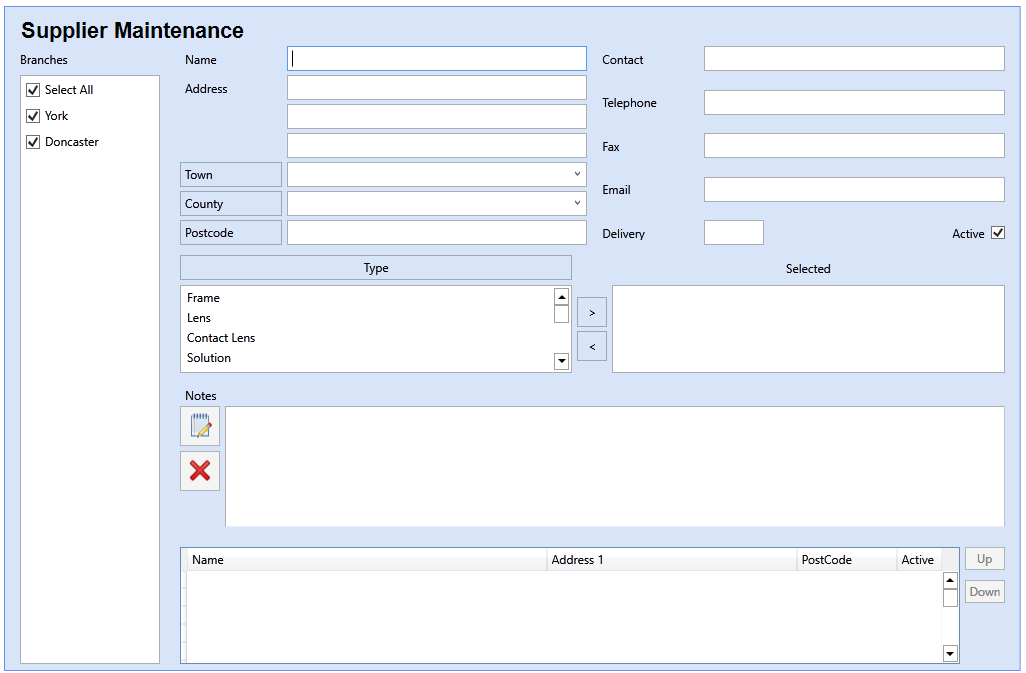
- Enter a Supplier Name.
- Enter the Address details.
- Enter the Contact details.
- Enter the estimated delivery time. This is the usual amount of time this Supplier takes to deliver orders.
- Make sure the Active tick box is ticked.
- Double click on each Product Type that your Supplier provides, to add that Type to the Selected list.
- Click Save or use the Auto Save feature.
Adding a Product
All Products are entered in the Product Maintenance screen.
To get to Product Maintenance while in the Stock module, you can either click on the Product button on screen, or, go to the Maintenance tab in the ribbon and click the Product button.
To add a new Product, do the following:
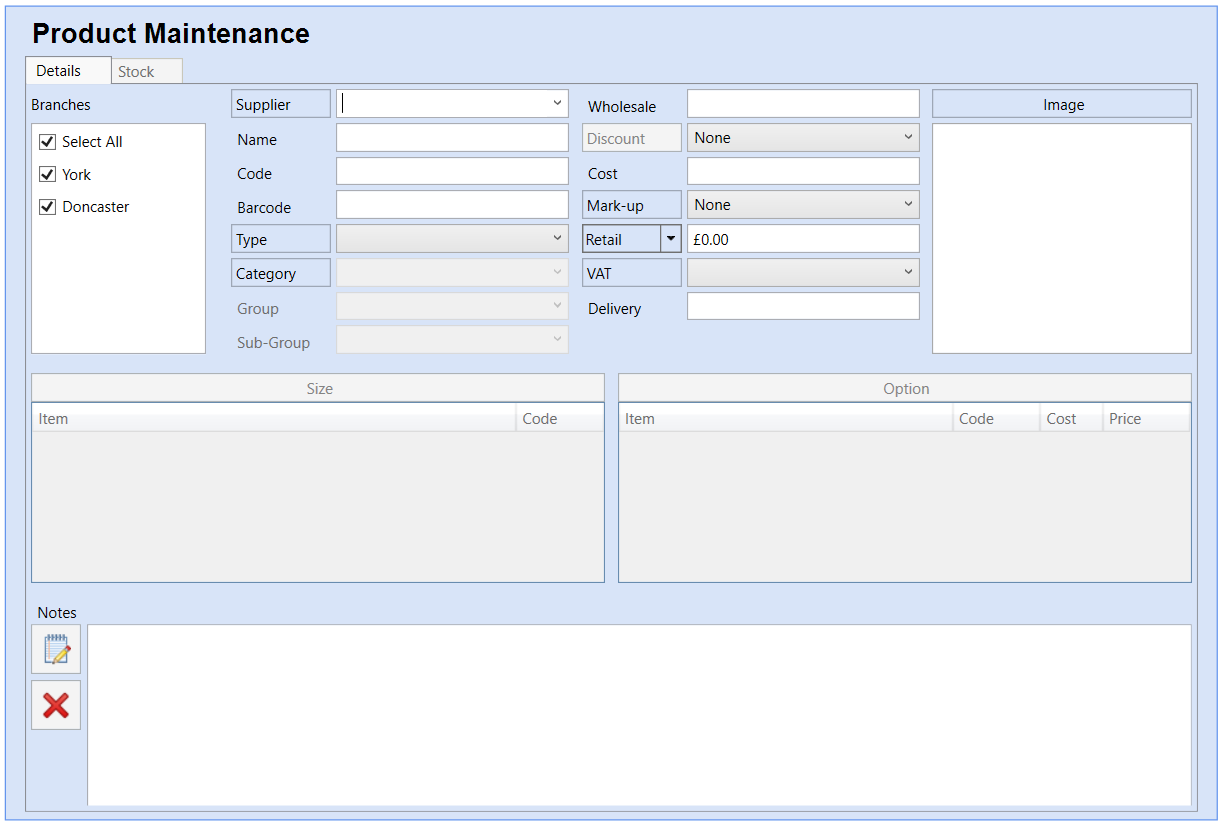
- Select a Supplier.
- Give your Product a Name.
- If required, enter a Code. This field is not mandatory.
- If you product has it's own existing barcode i.e. Box of Solutions, then this can be entered in the Barcode field.
- Select a Product Type.
- Select a Product Category.
- Select a Product Group.
- If enabled, select a Product Sub-Group. Please note, this field will be called something that is relevant to the type of product you are entering.
- Enter a Wholesale price. This is the price that the Supplier would generally sell the product for.
- You can now select a Discount. This will apply the Discount to the Wholesale Price and automatically calculate the Cost price.
- You can now select a Markup. This will apply the Markup to the Cost Price and automatically calculate the Retails price.
- Please note, the Wholesale, Cost and Retail prices can be manually entered, if you prefer to not use the Discount and Markup features. Also, none of these fields are mandatory, allowing you to leave them as £0.00 and manually enter the price at the point of sale if preferred.
- Select a VAT Rate. If no VAT Rate is selected, the VAT rate specified on the selected Product Type will be used.
- Enter an additional Delivery time. This value is in addition to the Delivery time specified on the selected Supplier.
- For some products, it might be necessary to enter multiple Sizes and Options.
- To add Sizes and Options, click on the relevant button. This will take you to either the Size or Option Maintenance screen where you can add any many of both as necessary.
- Click Save or use the Auto Save feature.
Product Types
To create a Product Type in the Stock Module, you need to do the following:
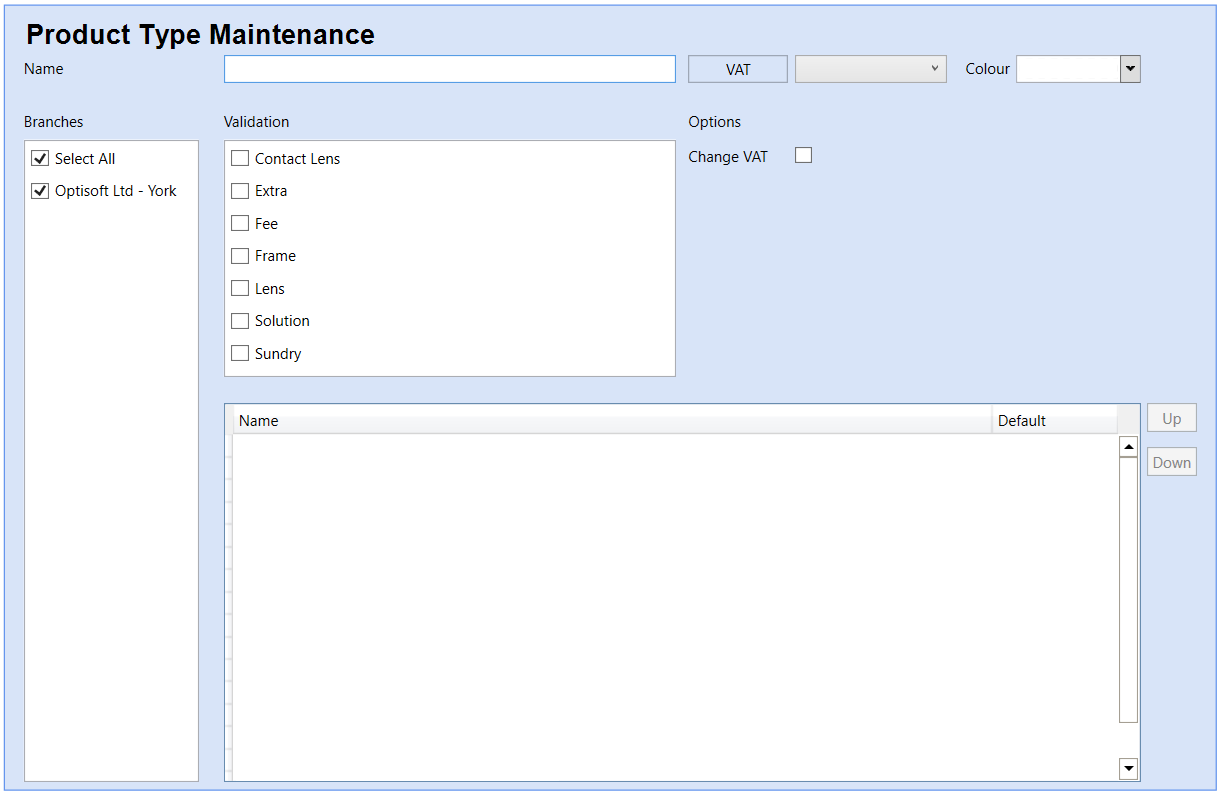
- Click the Maintenance tab in the toolbar.
- Click Type in the Product group.
- Enter a Product Type Name.
- Select a VAT type.
- Choose a colour.
- Select a validation option.
- Click Save or use the Auto Save feature.
Product Categories
To create a Product Category in the Stock Module, you need to do the following:
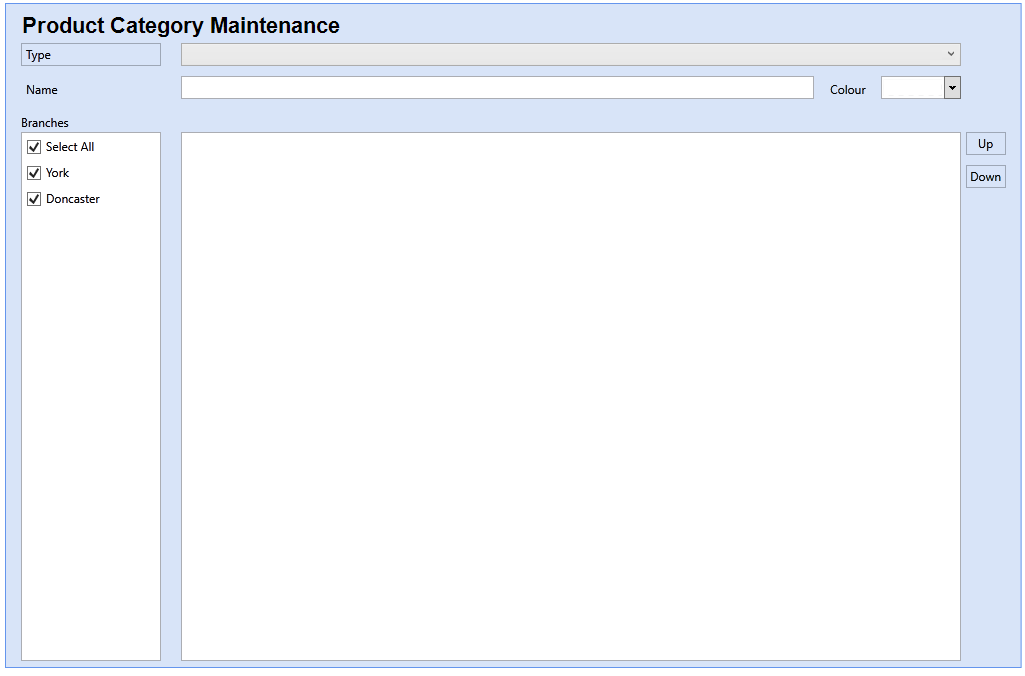
- Click the Maintenance tab in the toolbar.
- Click Category in the Product group.
- Choose a Product Type for your Category
- Enter a Product Category Name.
- Choose a colour.
- Click Save or use the Auto Save feature.
Discounts
To create a Discount that you can apply to Product Wholesale prices, you need to do the following:
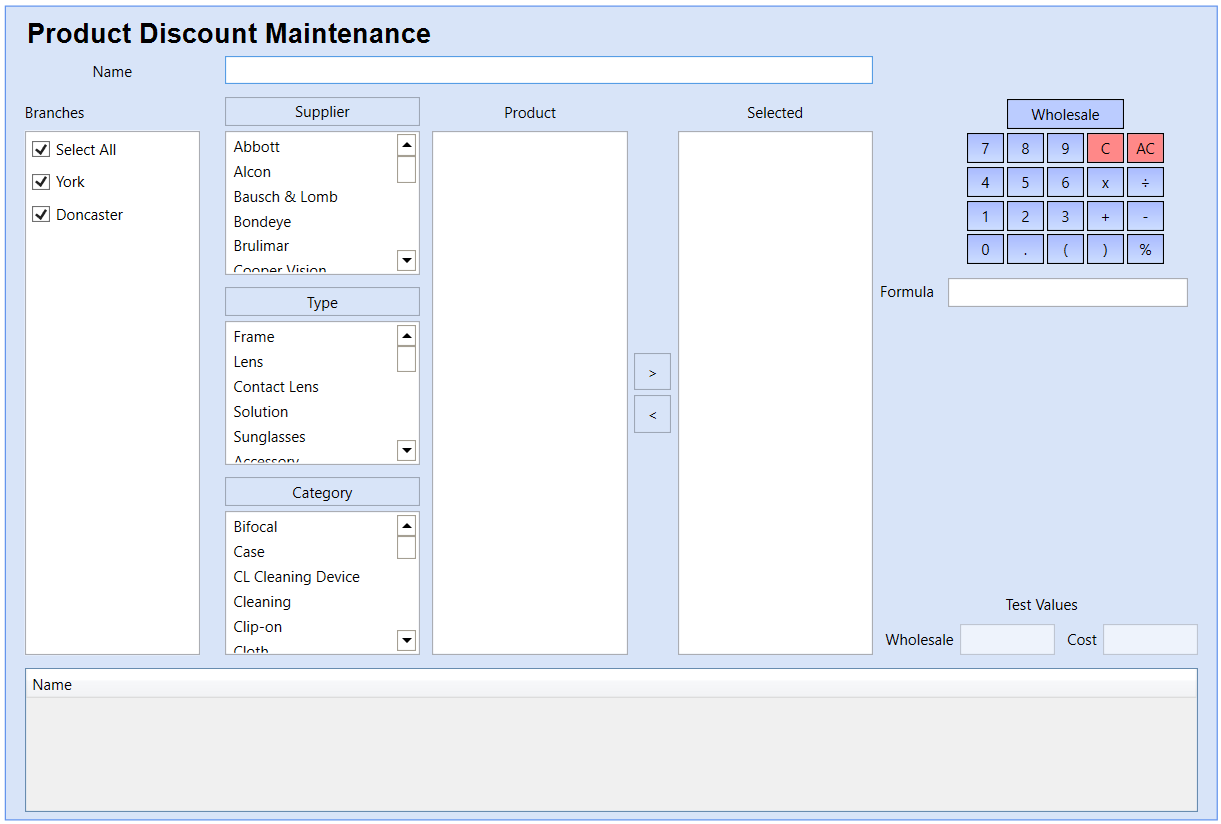
- Click on the Maintenance tab.
- Click on the Discount button in the Product group.
- Give your Discount a Name.
- Select from the Supplier, Type and Category filters to display the correct Products in the Product list.
- Move the relevant Products into the Selected list by either double clicking on them, or by using the arrow buttons.
- Use the calculator controls to enter your discount formula.
- Click Save or use the Auto Save feature.
Markups
To create Markup formulas that you can apply to Product Cost prices, you need to do the following:
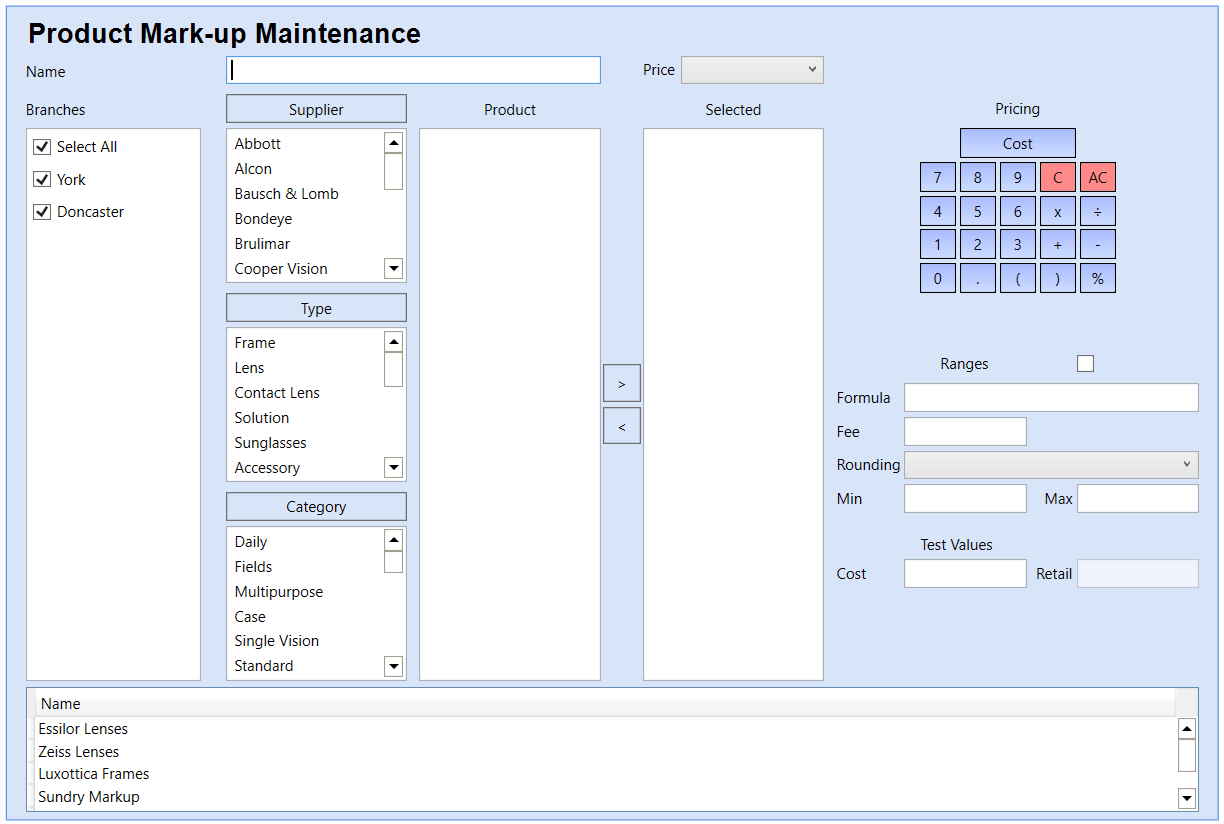
- Click on the Maintenance tab.
- Click on the Markup button in the Product group.
- Give your Markup a Name.
- Select the Retail price this Markup applies too.
- Select from the Supplier, Type and Category filters to display the correct Products in the Product list.
- Move the relevant Products into the Selected list by either double clicking on them, or by using the arrow buttons.
- Use the calculator controls to enter your Markup formula.
- If applicable, you can enter a set Fee to be applied in addition to your Formula.
- Choose the relevant Rounding Option.
- You can also choose a Minimum and Maximum value.
- Markup schemes can also be applied in Ranges which allows for multiple formulas in one Markup. To enable this feature, simply tick the Ranges tick box.
- Click Save or use the Auto Save feature.
Product VAT
To create Product VAT schemes that you can apply to Product Retails prices, you need to do the following:
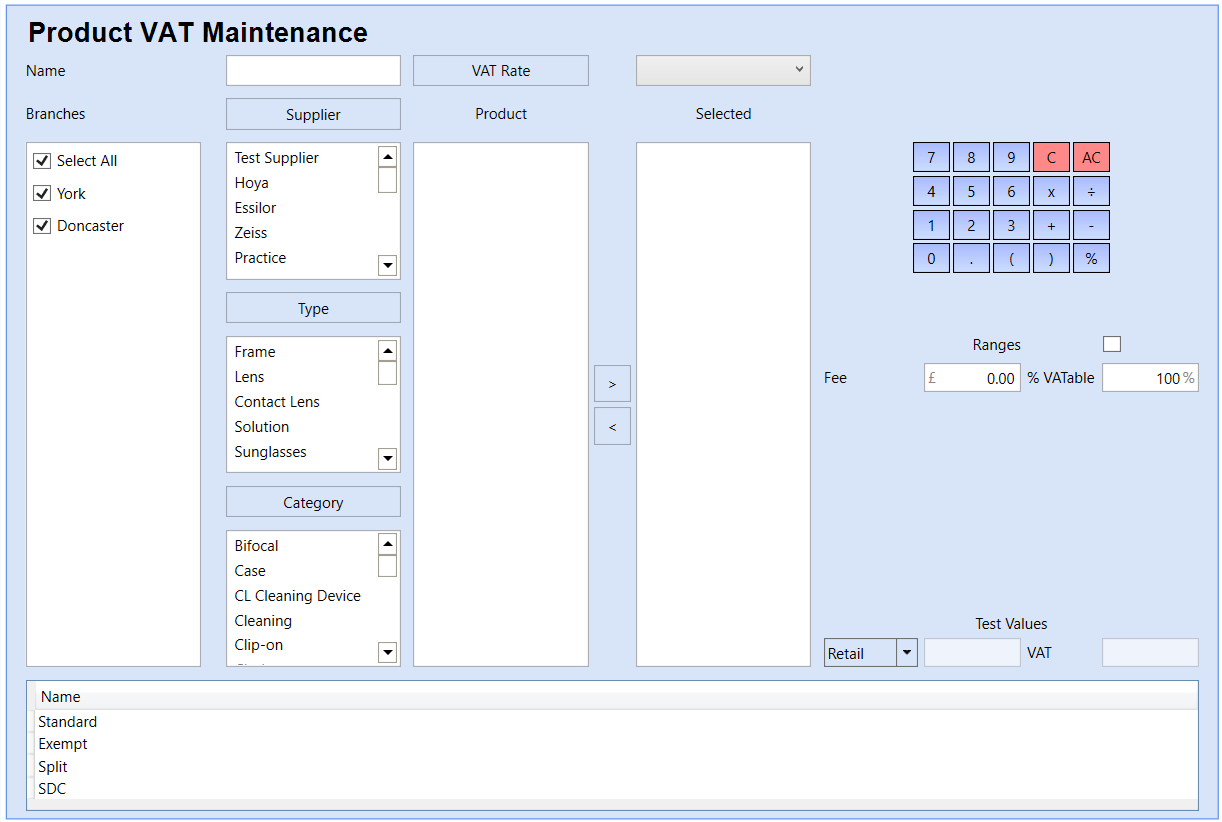
- Click on the Maintenance tab.
- Click on the VAT button in the Product group.
- Give your Product VAT scheme a Name.
- Select the relevant VAT Rate.
- Select from the Supplier, Type and Category filters to display the correct Products in the Product list.
- Move the relevant Products into the Selected list by either double clicking on them, or by using the arrow buttons.
- Use the calculator controls to enter your Product VAT Scheme details. A fixed Fee or Percentage can be added.
- Product VAT Scheme schemes can also be applied in Ranges which allows for multiple formulas in one scheme. To enable this feature, simply tick the Ranges tick box.
- Click Save or use the Auto Save feature.
VAT Rates
To create VAT Rates that you can apply to Product VAT schemes, you need to do the following:
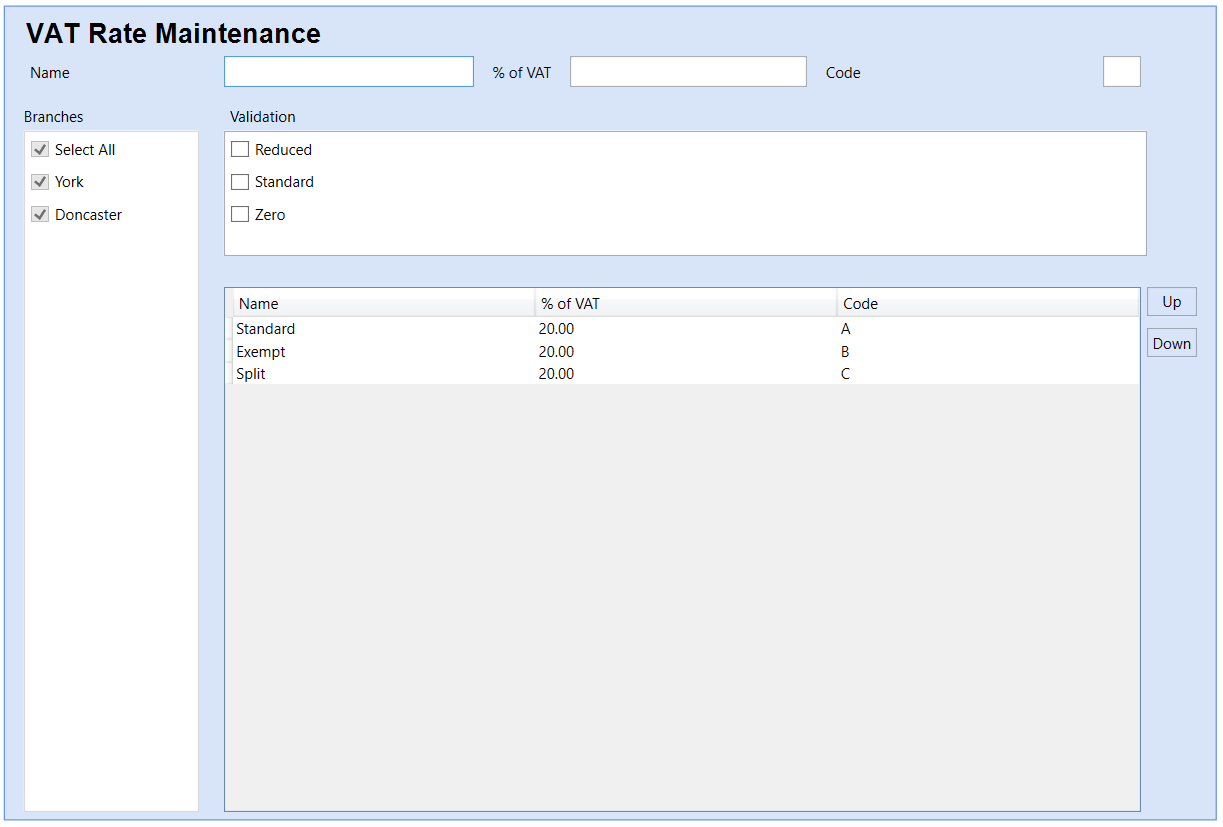
- Click on the Maintenance tab.
- Click on the VAT Rate button in the Product group.
- Give your VAT Rate a Name.
- Enter the % of VAT value.
- Enter a Code.
- Choose the relevant Validation option.
- Click Save or use the Auto Save feature.